View Compass Data Format Requirements.PDF
Quick Tips:
1. We strongly recommend performing a Compass Pre-Export LISS Compliance Check by opening your timetable file in V10 and clicking File|LISS pre-export compliance check before your first sync.
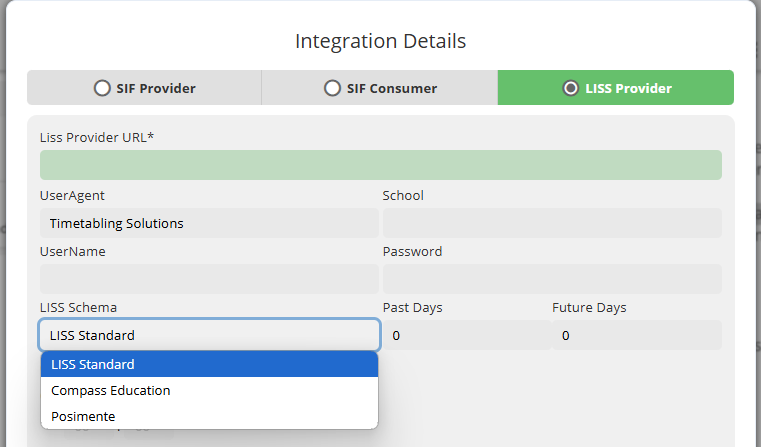
2. On the task tree, open [7A] SIF/LISS Integrations, and click Add+
3. Select LISS Provider and enter your details
- The password is most likely your API Key
4. Select 'Compass Education' for your LISS Schema and ensure your Class Start Dates match what you have in Compass.
6. You can leave the Past/Future DO Range dates blank or 0.
- Use 'Sync future date' if you want to send data from a date that is not today.
However, please note, semester two data will be lost if a sync with semester one data is subsequently performed (e.g. if Semester One Daily Organiser changes are synced after Semester Two had been synced). As such, we recommend leaving the semester two sync until the last day of semester one.
7. Choose to Sync Manually or at a particular time.
8. Click Save and click Validate (runs a check with the credentials entered without sending data to the connected system)
9. Click Synchronise, which will attempt to sync the Daily Organiser file marked as 'Published' in task 4 with Compass.
- Click View Log to view the status of each call
- Errors regarding the 'Remote Server', these refer to Compass, they are the remote server that we are sending to
10. If the Daily Organiser needs to push out changes outside of a schedule, they can initiate an immediate sync in the Daily Organiser app at any time. On the Daily Organiser home page, click Publish Daily Organiser | Sync.
NOTE: A pause of 5 minutes exists between syncing, making new changes and syncing again is required.
If your school does not use Daily Organiser:
You can still use the LISS Integration on the Management Portal by creating a 'dummy' Daily Organiser file. You may also consider creating a schedule to send the data to Compass each day at a particular time. This allows you to make timetable changes ahead of time, and publish your timetable to the Daily Organiser with a start date. When that date is current, the sync with Compass will send your relevant timetable to Compass.
1. Open the Management Portal.
- Go to task 2A Manage School and create a campus, academic year and add the term dates.
2. Open Timetabling Solutions V10
- open your semester two timetable and
- click Publish Timetable
- then click Publish Timetable to Web Daily Organiser
- Select the campus and academic year
- On the Start Date, select the first date of the term date you entered at step 1.
- Click Publish and click OK.
3. Once the timetable has completed publishing (expect this to take approximately 5 minutes), open Daily Organiser
4. In Daily Organiser:
- select the campus and academic year
(You do not need to import parameters from another file.)
5. Open the Management Portal, on the task tree go to [7A] SIF/LISS Integrations
- double-click your Compass Integration to open it
- select the campus and click Synchronise
- click View Log to view its progress and address any errors or issues that are listed. If the sync passes, consider creating a schedule that will sync the data to Compass each day at that time.
6. For future timetable changes, on the V10 Timetable Development home page, click Publish, Publish to Web Daily Organiser and enter a start date for that timetable.
- if you have configured a schedule on your LISS integration, you do not need to do anything else
- If you do not have a schedule, when you would like the data to be synced with Compass, open the Management Portal, on the task tree go to [7A] SIF/LISS Integrations, double-click your Compass Integration to open it and click Sync.